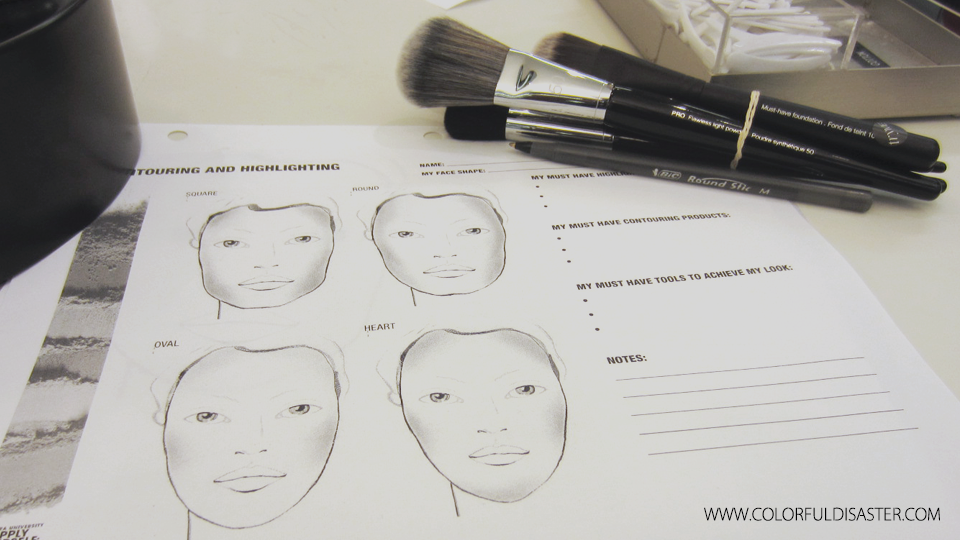
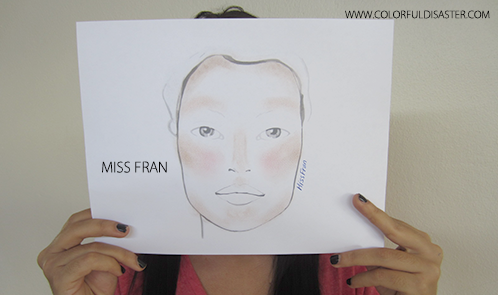
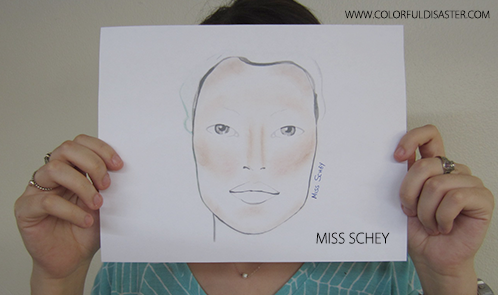
Hoy tuvimos la oportunidad junto a varias chicas más de participar en una taller privado en la tienda Sephora. En el taller nos mostraron las técnicas correctas para hacer el “Highlight and Contour” al maquillarnos. Luego de tener la cara lista con el canvas perfecto (luego de la base o tu elección, concealer y polvo) se comienza con el “highlight” o iluminador, desde la parte superior de la ceja bajando hasta llegar al pómulo creando la forma de la letra C. Continuando en el centro de la frente, más ligero en el puente de la nariz, justo encima de los labios lo que llaman el “Cupid’s Bow” y debajo de los mismos en la curva de la barbilla. Luego de esto viene el “Contouring” para dar profundidad, comenzando por la frente bien cerca de la línea del cabello, igualmente en cada lado de la cara comenzando desde la línea de cabello al lado de las orejas bajando por los pómulos, dependiendo de la forma de la cara puedes colocar un poco a lo largo de la quijada (puedes dejarte llevar por la técnica del 3 para que se te haga más fácil) y finalmente un poco a cada lado de la nariz. Para finalizar debes elegir un color de “Blush” o rubor que complemente tu tono de piel y colocarlo justo en las mejillas subiendo un poco en dirección hacia las orejas.
Today we had the opportunity, with several other girls to be part of a private workshop at the Sephora store. In the workshop they showed us the correct techniques to highlight and contour when getting our makeup done. After setting your face with the perfect canvas (after applying the foundation of your choice, concealer and powder) you should start with the highlighting, starting just at the top of the brow and going down around the eye until you reach the cheekbone, creating a C around the eye. Continuing lightly in the center of the forehead, the bridge of the nose, at the top of the lips or as it’s called the cupid’s bow and under the same at the curve of the chin. After that comes contouring to give depth to the face, starting at the forehead very close to the hair line concentrating on the sides, the same way at each side of the face starting from the hairline just besides your ears and going down in the cheekbone’s direction, depending on the shape of the face you can add a little of depth around the jaw line (you can use as reference the E-3 technique to make it easier for you) and finally contour lightly at the sides of the nose. To finalize you should choose a blush color that complements your skin tone and brush it at the apple of the cheeks going up a little in direction to the ears.
Luego de que termines puedes dedicarte al maquillaje de ojos y algunos detalles que te falten. El taller nos encanto y pensamos que las chicas que no tienen tanto conocimiento sobre maquillaje deberían comenzar a ir periódicamente a los mismos para que comiencen a educarse, no es porque sea algo esencial pero eso hará que resalten sus “unique features”.
Once your done with that you can work on the eye make-up and any other tweaks you may want to get done. We love the workshop and we think other girls that don’t have very much knowledge about make-up should start to attend periodically to them so they can get educated, not because it’s something essential, but because that would make their unique features stand out.
