Quiero compartir con tod@s ustedes mis aplicaciones de fotografía favoritas, trucos y consejos para tomar mejores fotos.
I want to share with all of you my favorite photography apps, tips and tricks to take better pictures.
![]()
Como ustedes saben, soy fotógrafa y tiendo a ver imágenes con potencial por las redes sociales, pero imágenes que aun no llegan al 100%. Sé que nos gusta publicar un poco demás, así que si vamos a hacerlo al menos hagámoslo con buenas fotos. He estado queriendo hacer esta publicación hace semanas y siempre hay algo que sucede que me hace posponerlo aun más y he visto un varias publicaciones acerca de lo mismo, ¡pero eso no me va a detener! Quiero compartir con ustedes mis truquitos cuando tomo fotos con mi teléfono y cómo me gusta cambiarlas en la etapa de post-proceso. Hay más de cinco cosas importantes que se deben tener en cuenta a la hora de tomar una foto, pero estas son los más importantes desde mi punto de vista.
![]()
As you may know I’m a photographer and I tend to see pictures with potential out there, but pictures that are not quite there. I know we like to post a little to much, so if we’re going to do it let’s at least share a good picture. I’ve been wanting to do this post for weeks now and something always comes up that makes me postpone it more and more, after that I’ve seen a few several posts about it too, but that is not stopping me! I want to share my tricks when taking pictures with my phone and how I like to tweak them in the post-process stage. There are more than five important things to have in mind when taking a picture, but these are the most important from my point of view.

![]()
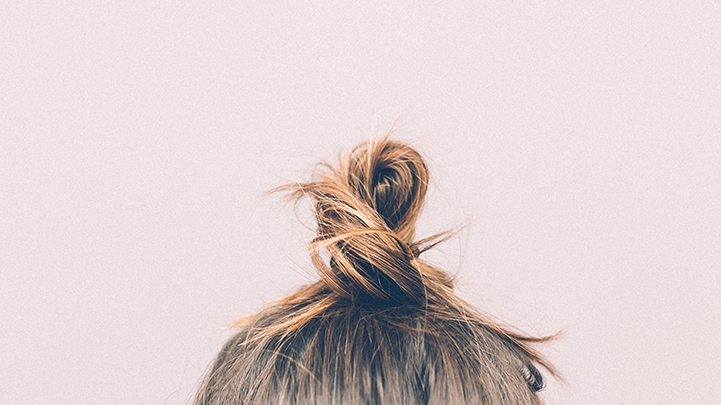
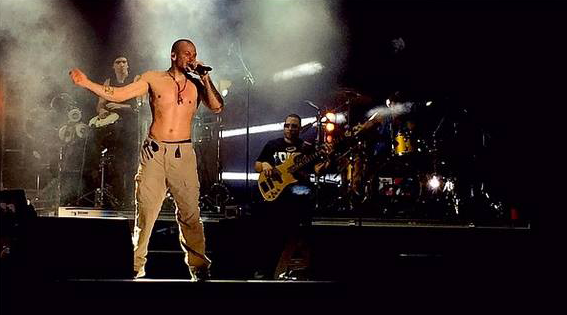
1. Iluminación – Bueno, lo más importante para mí cuando tomo una fotografía es la iluminación, la iluminación lo es todo, y es incluso en su propia definición. La fotografía es el arte o la práctica de registrar un momento de luz, si no hay luz no hay ninguna imagen, por eso usted tiene que asegurarse de usarla para que la imagen sea un éxito. Siempre busca la iluminación natural, acercarte a una ventana o si estás afuera aún mejor. Siempre estamos rodeados de luz natural y no tomamos ventaja de este recurso impresionante. Otra fuente de luz puede ser artificial, pero vamos a conseguir todo tipo de colores cuando usamos esta luz, ahora esto puede trabajar en nuestro favor si estamos tratando de mostrar algún tipo de emoción, pero si no es así, entonces tendremos que corregir esto en el post-proceso, es por eso que yo siempre prefiero usar la luz natural. Si estoy adentro y esta oscuro o el sol ya bajó, siempre trato de buscar una fuente de luz que me rodea y usar eso para iluminar mi marco. ¿Por qué estoy siendo tan meticulosa con esto? Porque cuando no hay la suficiente luz se produce grano en la imagen y los detalles no se muestran porque nunca fueron pintados en la imagen por la luz, entonces ¿por qué tomar una foto en lo absoluto si luego no se puede identificar nada en la misma? ¡Si vamos a hacerlo, entonces vamos a hacerlo bien!![]()
1. Lighting – So, the most important thing for me when taking a picture is lighting, lighting is everything, and it’s even in the definition itself. Photography is the art or practice of recording a moment with light, if there is not light there is no picture, that’s why you have to make sure to use it right so you’re picture is a successful one. Always look for natural lighting, get close to a window or if you’re outside even better. We’re being provided of it and do not take advantage of this awesome resource. Another source of light can be artificial, but we’ll get all colors when using these, now this can work in your favor if you’re trying to show some kind of emotion, but if not then you’ll have to correct this in the post-process, that’s why I always prefer to stick with natural. If you’re inside and it’s dark or the sun already came down, always try to look for a light source that surrounds you and use that to illuminate your frame. Why am I being so thorough with this? Because when there is no light grain occurs and details are not showed because they were never painted in the image by light, then why take a picture at all if nothing can be made out of it. If we’re going to do it, then let’s do it right!
![]()

![]()
2. Composición – Puede que muchos de ustedes no estén familiarizados con este término, pero para mí la composición de una imagen la puede llevar desde aburrida hasta realmente interesante. La regla más importante de la composición es la regla de los tercios, esta regla establece que se debe dividir el marco en tres secciones horizontales como verticales. Se puede comparar esto con el símbolo de libra o ahora conocido como un hashtag (#) estas líneas al reunirse entre sí crearán cuatro intersecciones que se podrían ver como puntos. El punto de interés en la imagen debe estar ubicado en uno de estos cuatro puntos o también puede ubicarse en una de las líneas, voy a añadir ejemplos para que puedan ver lo que quiero decir con esto. El resultado final debe ser una imagen que parece más atractiva a la vista en ves de centralizarlo todo. También hay otras cosas más simples que influyen en la composición, como el uso y la restricción de color, la presencia de líneas, patrones y texturas.
![]()
2. Composition – Many of you may not be familiar with this term, but for me the composition of a picture can take it from boring to really interesting. The most important rule of composition is the rule of thirds, this rule states that you should divide the frame in three sections horizontally and vertically. You can compare it to seeing a pound or now known as a hashtag sing on the entire frame (#) these lines when meeting each other will create four intersections that you could see as points. The point of interest in the picture should be located in one of these four points or you can also place it on one of the lines, I will add examples so you can see what I mean by this. The final result should be a picture that seems more appealing to the eye than if you just center everything. There are also another simpler things that can your composition, like the use and restriction of color, the power of lines, patterns and textures.
![]()

![]()
3. Fondo – Al tomar una fotografía hay que tratar de buscar un fondo limpio tanto como nos sea posible. No siempre tiene que ser de color blanco, tal vez un toque de color que es bueno para lo que estás buscando enmarcar, pero tener demasiados elementos en el fondo puede confundirnos cuando buscamos el punto focal y el propósito de la imagen se puede terminar perdiendo.
![]()
3. Background – When taking a picture try to look for a clean background as you possibly can. It doesn’t always have to be white, maybe a pop of color is good for what you’re looking in a picture, but having too many elements on the background can confuse the eye and you will end up loosing the purpose of the image.
![]()

![]()
4. La profundidad de campo – Puede que hayas notado que algunas imágenes tienen el fondo borroso, te hayas preguntado cómo lo hacen y cual es el punto. Bueno, esto se llama profundidad de campo y se usa para separar el primer plano del segundo. Si estás tomando un retrato y el fondo está lleno de autos, es mejor tener menos profundidad de campo, hacer que todo el fondo se vea borroso y así no nos distraen de la persona. Cuando el fondo está fuera de foco tiene menos profundidad de campo y cuando está todo enfocado significa que tiene más profundidad de campo. Este punto y el anterior también cuentan como reglas de composición, pero me pareció que tenían que ser explicados con un poco más de detalle.
![]()
4. Depth of field – You may have noticed some pictures having the background blurry, you may ask how they do this and what is the point. Well this is called depth of field and it’s used to separate the foreground from the background. If you’re taking a portrait and the background is filled with cars, it’s better to have less depth of field and make all of that background blurry so it’s not distracting from the person. When the background is blurry it has less depth of field and when it’s all in focus it has more depth of field. This point and the one before also count as composition rules, but I thought they needed to be explained a little more.
![]()

![]()
5. Enfoque – Éste punto puede parecer bastante obvio, pero créanme, he visto imágenes completamente desenfocadas y realmente me molesta verlas. Si tienes un iPhone, se que puede ser difícil a veces para que el enfoque se mantenga centrado en la misma cosa, sólo hay que seguir tocando el área donde deseas que este el enfoque durante unos segundos y se bloqueará.
![]()
5. Focus – This one might seem pretty obvious, but believe me, I’ve seen very poorly focused pictures and it actually bothers me. If you have an iPhone and I know it can be tricky sometimes for it to stay focusing the same thing, you just have to keep touching the area where you want the focus to be, for a few seconds and it will lock.
![]()
![]()
![]()
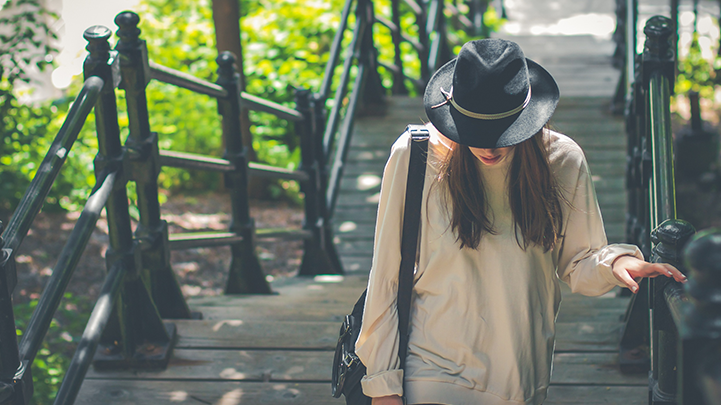
• En estas dos imágenes pueden apreciar el foco en un objeto en especifico, la iluminación apropiada, composición basada en la regla de tercios y el uso correcto del fondo.
• In these two pictures you can appreciate the focus in one object specifically, the appropriate lighting, composition based on the rule of thirds and the correct use of the background.
![]()
Mis seis aplicaciones favoritas de fotografía [esta es una pregunta difícil].
My top six photography apps [this is a hard one].
![]()
1. La aplicación de la cámara – Para comenzar a trabajar en una imagen, tienes que tomarla primero y elijo utilizar la aplicación de la cámara que trae el teléfono. Aquí mismo puedo ajustar el brillo, como veo el cambio antes de tirar la foto no necesito usar ninguna otra aplicación mas compleja que a final de cuentas hace lo mismo.
![]()
1. The camera app – To start working on a picture you have to take it first and I choose to just use the camera app the phone brings because it already let’s me adjust the brightness as I see the change and I don’t need any other fancy app that ultimately does the same.
![]()
2. Photoshop Express – Esta es la aplicación que más utilizo. Elijo ésta por encima de las otras solo para su herramienta de corrección de ruido, que es la más parecida a la reducción del ruido en Adobe Lightroom y para mí esto es muy útil. Aquí también puedo ajustar la exposición, saturación, sombras y luces, el tono y la temperatura y el contraste, la mayoría de estos ajustes se pueden hacer en cualquier otra aplicación, pero creo que esta lo hace mucho mejor. También cuenta con filtros muy sutiles que harán que tu imagen se vea mejor sin que parezca que tienen mucho trabajo hecho.
![]()
2. Photoshop express – This is my mostly used app. I chose this one above the others just for its noise correction tool, to be it’s the most similar to noise reduction in adobe lightroom and for me this is very useful. Here you can adjust exposure, saturation, shadows and highlights, tint and temperature, contrast, most of these you can do in any other app, but I think this one does it much better. It also has very subtle filters that will make your picture look better without it appearing to have a lot of work done.
![]()
3. A Beautiful Mess – Esta aplicación tiene algunos filtros que pueden utilizar, pero en su mayoría la uso debido a los doodles lindos y las tipografías que tiene. Puedes cambiar los colores y añadir todo tipo de dibujos bonitos, así como cualquier palabra que desees, elijes la tipografía o usas alguna de las palabras que ya tienen listas. Simplemente añade un toque femenino a mis fotos.
![]()
3. A Beautiful Mess – This app has some filters you can use, but I mostly use it because of the cute doodles and fonts it has. You can change the colors and add all kinds of pretty drawings as well as any word you can by selecting a font or some words they have already made. It just adds a girly touch to some pictures.
![]()
4. InstaSize – Esta aplicación te permite ajustar la imagen para que quepa dentro de un marco cuadrado y esté lista para publicar. También te permite posicionar varias fotos en un mismo marco, añadir texto y filtros. La edición en general me gusta hacerla en la aplicación Photoshop y luego llevarlo aquí para ajustar el marco.
![]()
4. InstaSize – This app lets you adjust the picture so it can fit in a square frame and be ready to post. It also lets you use several pictures in one frame, add text, overlays and filters. The overall edit I like to make it on the Photoshop app and then take it here to adjust the frame.
![]()
5. Facetune – Esta aplicación es muy útil para mí, puede difuminar ciertas partes de la imagen para añadir profundidad y afinar detalles, puede resaltar ciertas cosas de la imagen y hacerla más atractiva.
![]()
5. Facetune – This app is really useful for me, you can blur certain parts of the picture to add depth and sharpen details, it can bring certain things that you want out of a picture and make it more appealing.
![]()
6. Instagram – Éste app también cuenta como una aplicación de fotografía, te permite ajustar la imagen como en cualquier otra aplicación, aunque yo no suelo hacer esto. Es solo mi primera opción para compartir fotos en las redes sociales.
![]()
6. Instagram – This one too counts as a photography app, you can tweak your picture here too, though I don’t tend to do this. It’s just my primary choice for photo sharing on social media.
![]()
Estos son mis consejos y truquitos, espero que les guste y estoy ansiosa de ver esas fotos increíbles que van a tomar. Esto es para fotografía desde sus teléfonos, si tienen una cámara SLR o alguna otra cámara profesional y tienes alguna pregunta, eso ya es una conversación más profunda, pero puedo darles tips para eso también, escribe un comentario o un correo electrónico y me comunico contigo. Otra cosa, traten de que tus fotos sean horizontales, nuestro ojo ve todo en esta dirección y será automáticamente más atractivo para el ojo del espectador. ¡Espero que esto le ayude!
![]()
These are my tips and tricks, I hope you like them and I can’t wait to see those amazing pictures you take. This is for phone photography, if you have a professional SLR or DSLR camera and have a question, that’s a deeper topic, but I can totally talk to you about it, just write a comment or an email and I’ll get back to you. Another thing, try to take pictures horizontally, our eye is made to see everything like this and it will automatically be more appealing to the eye of the spectator. I hope this help you out!
![]()